Create Students
Use the Admin Dashboard to create and manage your roster of students.
To create a single student:
- Log into Saga Connect
- Navigate to the Roster tab
- Select the Student sub-tab
- Click the Add Student button

-
Fill in the various fields and click Save.

The Upload Roster feature is the easiest way to upload a large number of students at once. Follow these steps:
- Log into Saga Connect
- Navigate to the Roster tab
- Select the Student sub-tab
- Click the Upload Roster button

-
If you already have a CSV file made, click Import a Roster File, otherwise you can find an example in the lower right
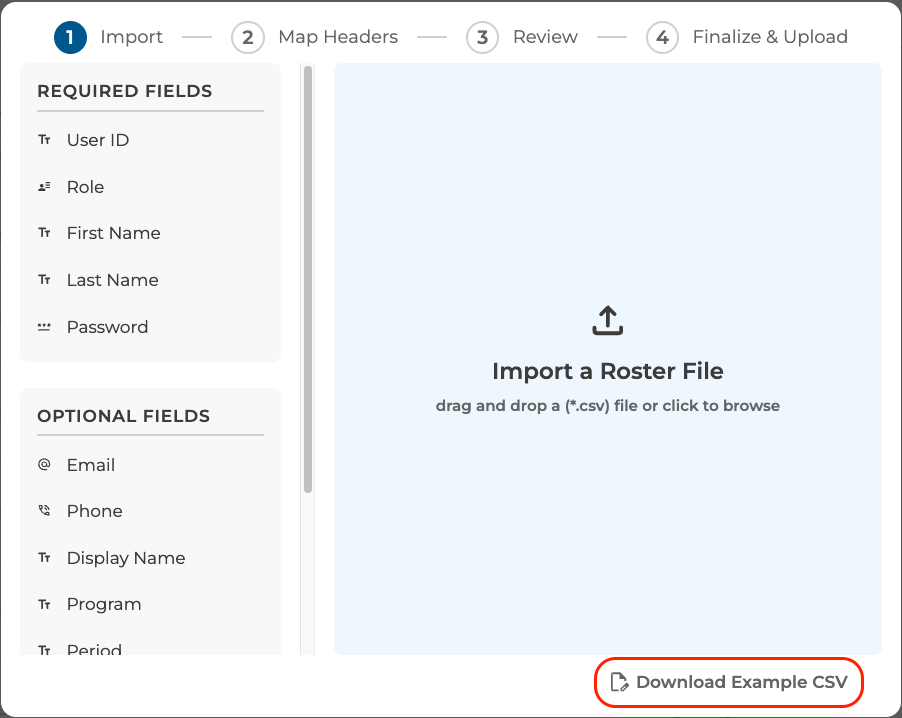
- Select the CSV file to use
- Please note that the Roster Uploader will be looking for a CSV with the fields shown on the left (required and optional) in the pop-up.
- After importing the roster file, you will map the headers of the imported CSV file to the Saga Roster Headers.


- Once you have selected the headers to map to each of the Saga headers, click Next.
- Correct any errors highlighted in red, or press Next if there are no errors.


- Click Upload Roster button to complete the upload.

- Press the Reload Page button to view the uploaded roster data.
